EDCI 337

Author: addifowler

Assignment 3: Rich Multimedia Lesson

Addi Fowler, Maya El-Lakany, Nicole Campbell & Skye Rohani

For our multimedia undertaking, we directed our attention towards the thematic exploration of trees. The impetus behind this selection was grounded in the profound expertise of one of our group members, coupled with a shared interest among the team. Significantly, Maya had previously curated an instructive lesson on trees for her Module 4 blog. Building upon this groundwork, we collectively resolved to delve more profoundly into the subject, elevating her initial lesson into a dynamic video and extending it into a comprehensive project.

To start off, we created a lesson plan following the techniques we had learned through Module 4:

Lesson Plan:

Overview

This week, students will be learning about trees. They are essential for maintaining the balance of oxygen and carbon dioxide in the atmosphere, providing habitats for various species, preventing soil erosion, and providing resources crucial for human survival and well-being. Trees are part of the science curriculum and are required by the British Columbia Grade 3 curriculum. Last week students learned about plants, providing a basis as to what trees are and their importance. Next week students will learn about the environment, which trees are an important member of.

Lesson Objectives

By the end of the lesson:

  • Learners will be able to identify the different parts of a tree.
  • Learners will be able to name the different types of trees.
  • Learners will be able to identify trees in nature.
  • Learners will understand the importance of trees on our planet and in our ecosystem.

Read/Watch

Students can watch this video and read “The Busy Tree” by Jennifer Ward if they would like extra information on our lesson.

Content

  • The teacher will review the different parts of a tree by showing a real example.
  • The teacher will explain the two types of trees.
  • The teacher will explain how trees provide oxygen and how this affects people and the planet.
  • The teacher will explain how leaves, wood, and food are harvested from trees to provide humans with resources.
  • The teacher will explain how animals use trees for homes and food.

Application

Students will complete both H5P learning activities (Structure of a Tree and Word Search) to test their knowledge of the topics.

Students and teachers will walk around the school grounds and identify trees as well as each type.

Students and teachers will walk around the school and identify where and how trees are being used (food, wood, etc.).

Reflection

Students discuss their findings from home the following day with 2-3 other students and they will answer the following questions in their group:

  1. What was the most surprising find?
  2. How do you think trees affect your life day to day?
  3. What types of trees did you see around your home? Why do you think this is?

Afterwards the teacher will lead a classroom discussion on their findings.

To Do This Week

  • Watch the video “Trees for Kids” (extra)
  • Read the book “The Busy Tree” by Jennifer Ward (extra)
  • Complete H5P activity: Word Search
  • Complete worksheet activity: Structure of a Tree
  • Identify three ways trees are used in and around your home
  • Have a discussion with a group of 3-4 student

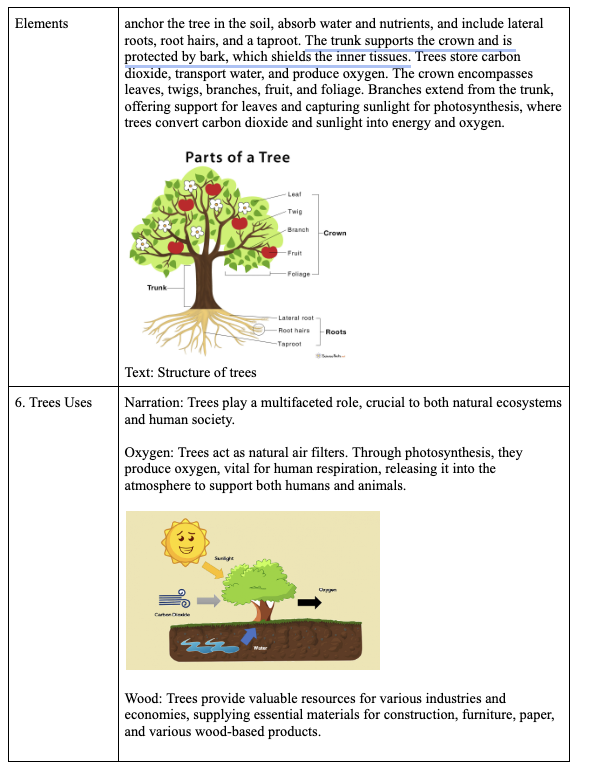
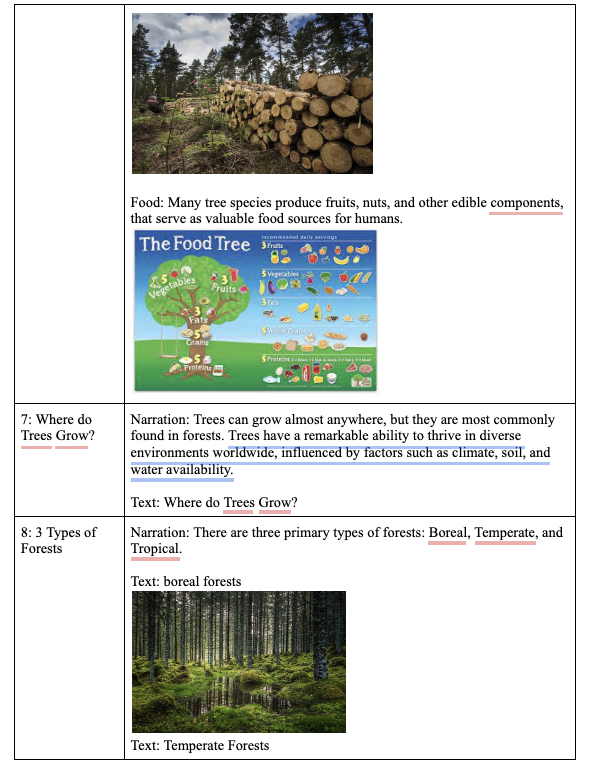
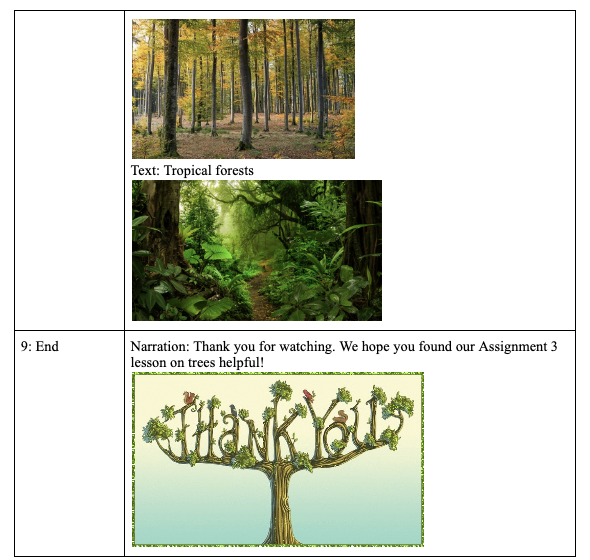
Following this, Nicole designed a story board and script based on the things we wanted to teach/showcase in our video.

Storyboard/ Script:

The creation of this script and storyboard involved a thorough examination of previous module readings, media resources, multimedia materials, blog posts, and assignments. Our decision to focus on the topic of “trees,” a subject previously explored by Maya in Modules 1 and 4, significantly streamlined our workflow. In Module 1: Theories of Multimedia Learning, Maya diligently outlined the pre-storyboarding principles considered in our storyboard:

Storyboarding encompasses a wide range of intricacies, serving as an essential guide throughout the video production and editing processes. This specific storyboard places a strong emphasis on detail, incorporating elements such as on-screen text, photos, and narration to facilitate the filming of the script. Our storyboarding process is informed by a collection of Mayer’s Principles, including:

  • Limited Capacity (Cognitive Load Theory): Mayer’s theory recognizes the limitations of learners’ cognitive capacity and addresses the challenges posed by cognitive load (Mayer, 2012). This storyboard meticulously manages the script to prevent overload and maintain information efficiency.
  • Dual Coding Theory: Mayer’s CTML acknowledges the effectiveness of integrating both visual and verbal information, aligning with the core principles of dual coding (Mayer, 2012). The storyboard seamlessly incorporates both narrative elements and visual components, in accordance with Mayer’s Dual Coding Theory.
  • Active Processing: Mayer underscores the significance of active processing, emphasizing that we develop cohesive mental representations by actively filtering, selecting, organizing, and integrating information (Mayer, 2012). The organization of this storyboard follows a coherent sequence for the integration of each point. This deliberate engagement stimulates the audience to engage in profound reflection on the speech’s content, encouraging them to contemplate their responses. As a result, it amplifies their attention and deepens their comprehension.
  • Extraneous Cognitive Load: This storyboard adheres to the coherence principle by consistently staying on topic and including only relevant information in the table of contents.
  • Intrinsic Cognitive Load: The process of pretraining lays a solid foundation for group members to facilitate a smooth filming process. To manage intrinsic cognitive load effectively, I adopted a meticulous approach to segmentation. Our storyboard is presented in a structured table format comprising nine sections, ensuring concise textual content. By proceeding with this storyboard, we aim to adhere to the modality principle, voice principle, and image principle. This will involve human narration of the storyboard and script, complemented by visual elements. Notably, our emphasis on social cues, characterized by polite and natural speech, exemplifies the application of the Personalization Principle.
  • Germane Cognitive Load: This storyboard equips the filming team to maintain a clear script devoid of unnecessary information, thereby minimizing germane cognitive load.

By integrating Mayer’s Principles in our storyboard, we aim to create an inclusive learning environment that enhances support and flexibility to meet the diverse needs of all learners.
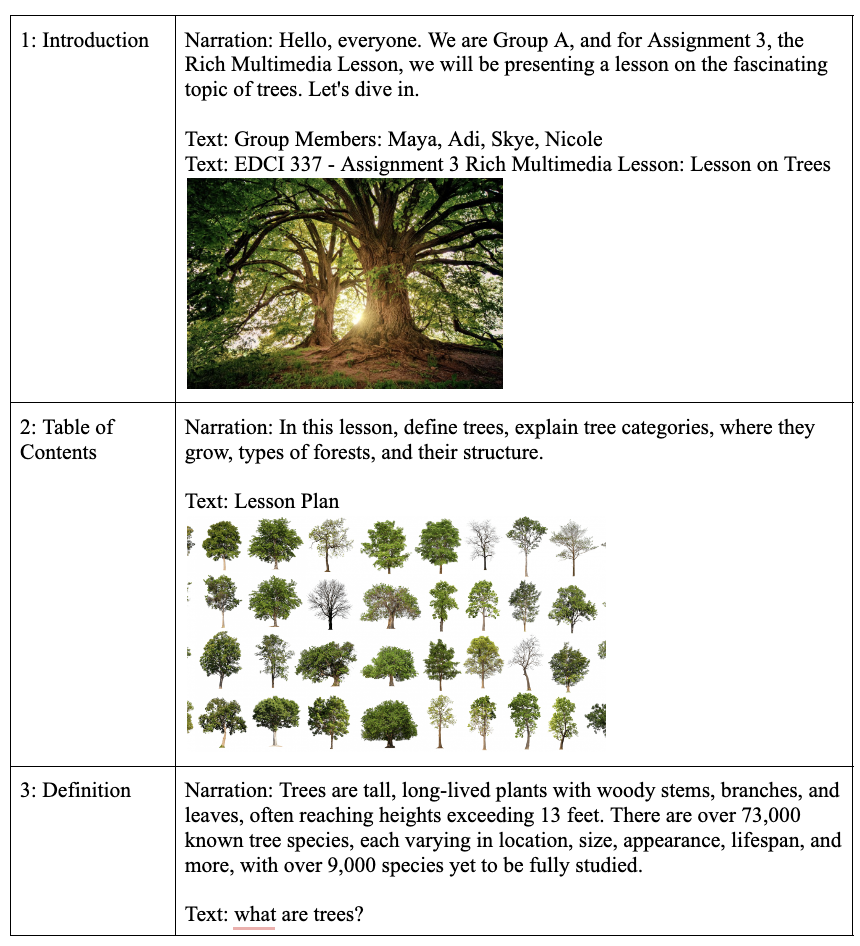
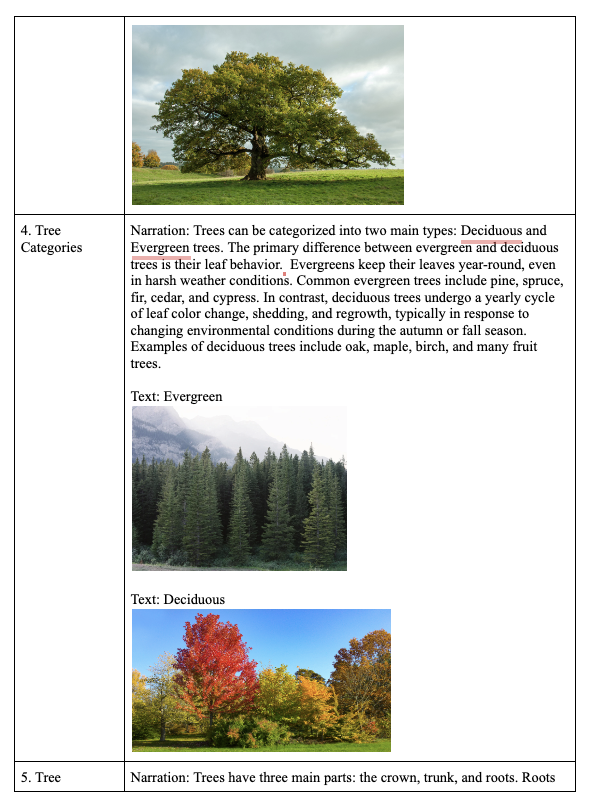
Additionally to our storyboard, we also created an HP5 activity for our users, as well as a worksheet just to add in some supplemental activities.

HP5 Word Search

Tree Worksheet
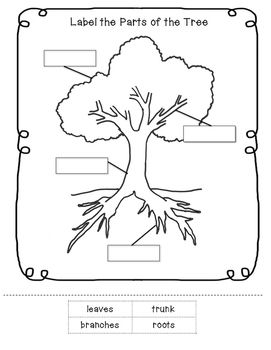
Following our storyboard, we began to put everything together. Skye and Maya spent some time out in nature filming the lesson and putting all of the pieces together, and Addi spent the time editing in the correct order and adding the text and captions to the screen. After all of the steps together, we came to our final product.

Our Multimedia Lesson Video:

Group Reflection

The decision to center our lesson around the theme of “trees” was intentional. Recognizing that trees are a universal and vital aspect of our environment, we aimed to create content that would resonate with a diverse audience. By choosing a topic with broad appeal, we sought to ensure that our lesson would be inclusive, catering to a wide range of learners with different interests and backgrounds. Inclusivity, for us, was not just about accessibility but also about crafting content that could engage and captivate learners from various perspectives.

Our approach to developing the storyboard and script was deeply rooted in Mayer’s principles of multimedia learning. The attention to cognitive load, dual coding theory, and active processing was not just an academic exercise but a deliberate effort to create a learning experience that aligns with evidence-based practices. For instance, considering the limited capacity of learners, we structured the script to prevent overload while maintaining information efficiency. The incorporation of visual and verbal elements, in line with dual coding theory, aimed to provide a well-rounded learning experience. By emphasizing active processing, we intended to stimulate our audience to engage deeply with the content, encouraging reflection and comprehension.

Although small, the decision to integrate H5P activities, particularly the Word Search, was a conscious choice to add an interactive layer to our lesson. This went beyond merely following a trend; it was about recognizing the diverse learning styles of our audience. As we have learned through this process – interactive elements have the potential to engage learners actively, making the learning experience more dynamic and participatory. In doing so, we not only adhered to Mayer’s principles but also responded to the evolving landscape of educational technology and its impact on engagement. The addition of the Tree Worksheet as a supplemental activity was driven by a recognition of the diverse needs of learners. While our video and H5P activities served as primary engagement tools, the worksheet offered an alternative avenue for learners who may benefit from additional resources or approaches. It was about acknowledging that learners have different preferences and learning styles, and our aim was to provide a range of resources to accommodate those differences.

Taking our lesson outdoors, filming in nature, and encouraging students to explore trees in their surroundings was more than a logistical decision—it was an educational one. We believed that connecting educational content with real-world experiences could profoundly impact understanding. The decision to step out of the traditional classroom setting aimed to make the learning experience more authentic and relatable. It was about creating a connection between the lesson content and the world around us, fostering a deeper appreciation for the subject matter.

The collaborative efforts in the filming and editing processes were a testament to the strength of teamwork. Each team member brought a unique set of skills and perspectives to the project, enriching the final product. The collaborative process was not without its challenges, but it reinforced the idea that diverse skills and viewpoints contribute to a more comprehensive and well-rounded outcome. It was about leveraging our collective strengths to create a multimedia lesson that was greater than the sum of its parts.

In conclusion, our multimedia lesson on trees was not just a project; it was a deliberate and thoughtful endeavour to create an inclusive, engaging, and impactful learning experience. It was about more than just delivering information; it was about crafting an educational journey that resonated with learners on various levels, aligning with both established educational principles and the evolving landscape of educational technology.

References

Mayer, R. E. (2012). Principles of Multimedia Learning. Digital Learning Institute. https://www.digitallearninginstitute.com/blog/mayers-principles-multimedia-learning/

Weber, Lillian M. , Everett, Thomas H. and Berlyn, Graeme Pierce. “tree”. Encyclopedia Britannica, 24 Oct. 2023, https://www.britannica.com/plant/tree. Accessed 5 November 2023.

Cazzolla Gatti, Roberto, et al. “The number of tree species on Earth.” Proceedings of the National Academy of Sciences 119.6 (2022): e2115329119.

Butler, R. A. (2022, March 14). Types of Forests: Definitions, Examples, and More. Treehugger. https://www.treehugger.com/types-of-forests-definitions-examples-5180645#:~:text=Boreal%20forests%2C%20found%20farthest%20north,harbor%20incredible%20amounts%20of%20biodiversity

Image 1: https://images.app.goo.gl/KqWqns1N3pyhU5kH6
Image 2: https://images.app.goo.gl/jZTGwriuJsaJZVxC7
Image 3: https://images.app.goo.gl/WdjeuSYuoL1F5k5r5
Image 4: https://images.app.goo.gl/RgccprCpYuHzmFKv6
Image 5: https://images.app.goo.gl/xM6hcTheEcr7yAru9
Image 6: https://images.app.goo.gl/ZZSft1LPemUjSrPGA
Image 7: https://images.app.goo.gl/zrk5zd6oqkS7fmVw6
Image 8: https://images.app.goo.gl/BVqF1cp353oeZjUt5
Image 9: https://images.app.goo.gl/LdWquY9dSGr78TKd9
Image 10: https://images.app.goo.gl/HgqJHbWAbNRmv9bF8
Image 11: https://images.app.goo.gl/Q2hmXyBA1rvUefsg6
Image 12: https://images.app.goo.gl/W5acF93dLq4NSBWF8
Image 13: https://images.app.goo.gl/JHLqrQmLDzxrNyw8A
Image 14: https://images.app.goo.gl/4BMwepHEx6gkfbNB7
Module 5: Advanced Multimedia Tools

Generative AI

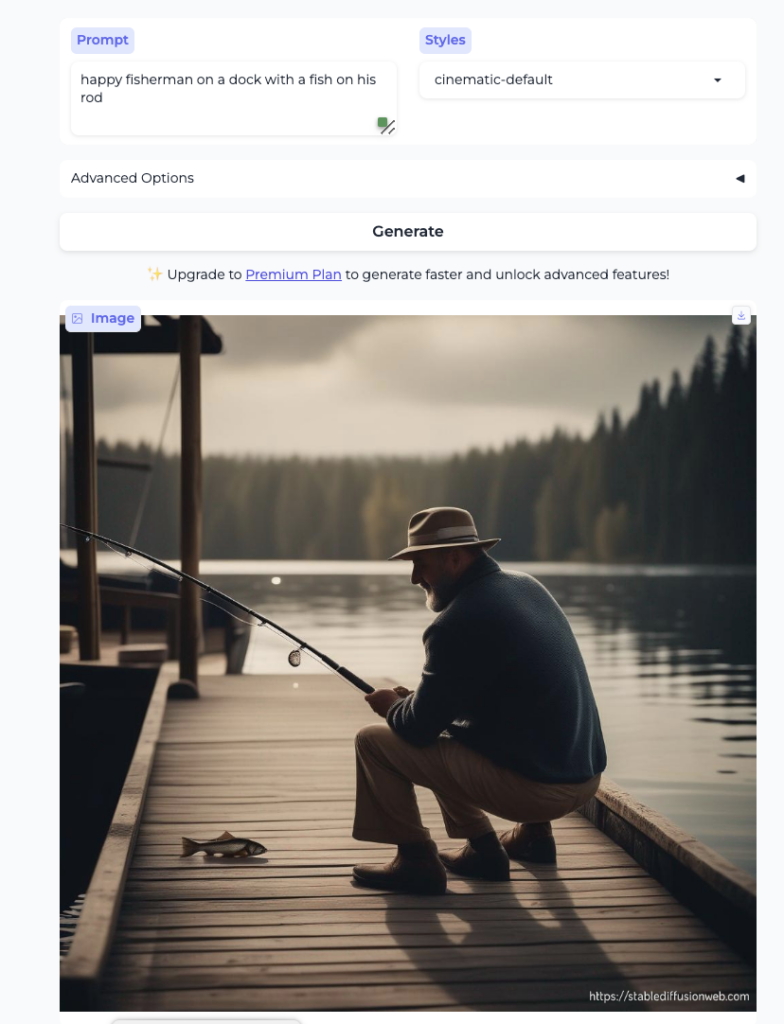
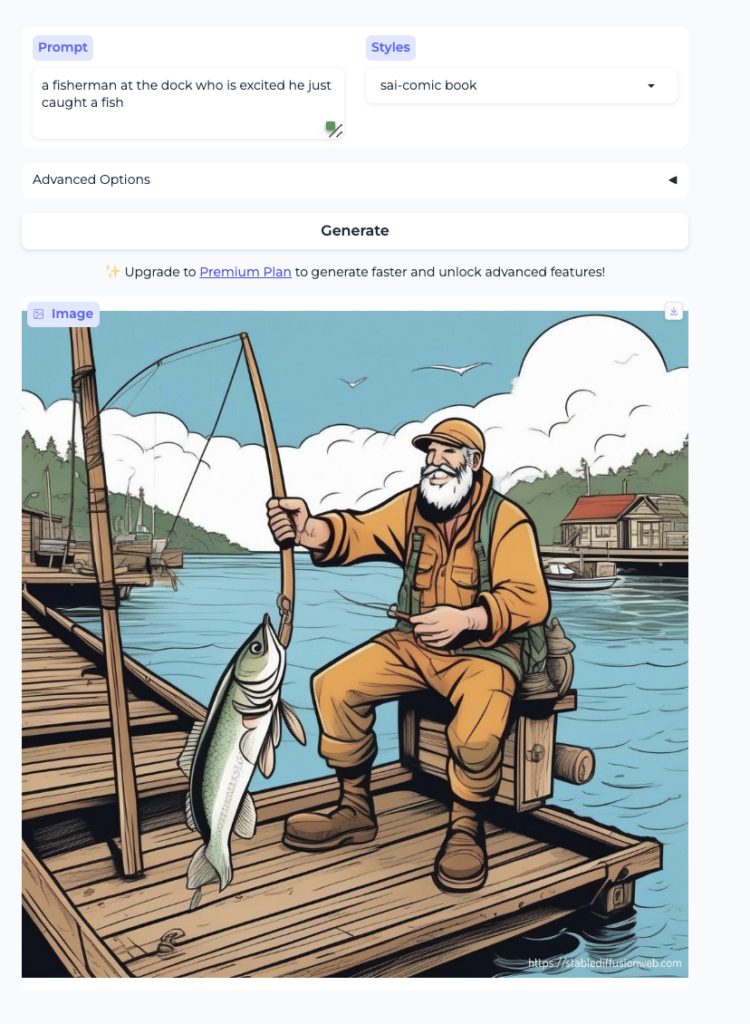
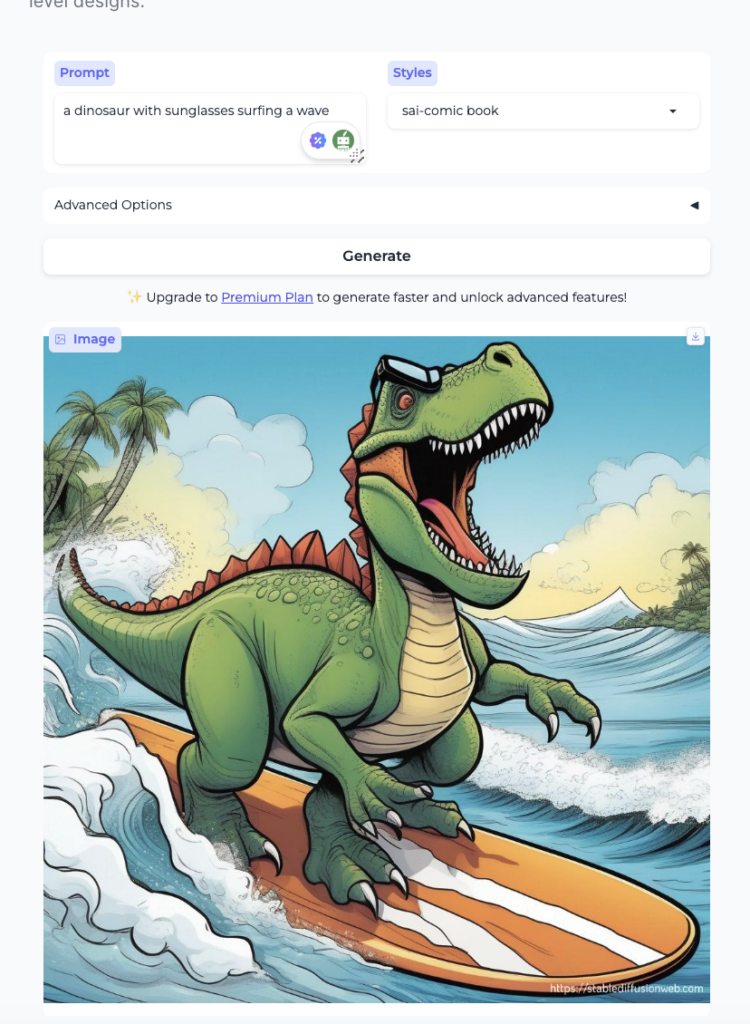
I chose to use one of the photo AI applications because they were the ones I hadn’t had a lot of time playing around with. I thought that it did a pretty great job with the prompts that I gave it, and I thought that it was cool that it generated different photos based on what style you chose. I tried out two different styles. I tried out similar prompts for them because I wanted to see how different the photos would be, and then I tried out a different prompt just for fun.

Have you used AI applications before? If you have, what have you used them for? What apps have you come across that are not in the Explore section that you’ve found useful?

I can honestly say that I have used ChatGPT almost daily since it became available in November of last year. I have found it to be an absolutely wonderful tool if it’s utilized in the right manner. I use it mainly for studying, as it has helped me summarize large chunks of information and come up with the best areas to focus on when it comes to midterms. It helps me generate better sentence structure and gives me suggestions on how to improve my writing when it comes to writing essays and papers.

How might the use of these tools create a more inclusive learning experience? Who might be excluded?

Reflecting on the potential integration of AI tools in education, there emerges a notable prospect of fostering inclusivity within the learning experience. The prospect of personalized learning paths, facilitated by AI, holds promise for accommodating diverse learning styles and providing tailored feedback. Features enhancing accessibility, particularly for individuals with disabilities, and language support tools for non-native speakers underscore the potential for inclusivity. However, a measured consideration of potential limitations is essential. The prospect of a digital divide, where some students may lack access to the necessary technology, emphasizes the need for equitable distribution. Additionally, the recognition of biases within AI algorithms necessitates a vigilant approach to ensure fairness across diverse student populations. Recognizing these challenges, there is a collective responsibility to navigate the integration of AI tools thoughtfully, addressing potential exclusions, and creating an educational landscape that is genuinely inclusive and accessible to all.

What ethical concerns do you have (or not have) about the use of some of these tools?

As we explore the integration of AI tools in educational settings, there are definitely ethical considerations that come into play. Obviously, this is being widely discussed among educational institutions in terms of AI’s ability to generate information for students. I have already seen a lot of my teachers transition back to paper exams and tests as opposed to online ones due to the ability that AI gives students to cheat. As I mentioned earlier, I think that AI is a wonderful tool if it is utilized in the proper way, so I can understand the worry amongst professors and teachers with the fear of students using it in a proper way. A couple of other concerns that are associated with AI could be the fact that not everyone has the same access to technology, creating a potential gap where some students might miss out and not be able to have the opportunity to utilize it. 

Aside from the educational side of things, another topic of AI that is a concern is its ability to do identity replication, especially prevalent in the music and film industries. Deepfakes, for instance, allow AI to mimic someone else’s face or voice. While it’s a game-changer for movie effects, there’s a darker side when it’s used deceptively. It’s essentially AI donning someone else’s identity, and that brings a whole new layer of ethical complexity into the mix. For both musical artists and actors and actresses, this allows people to copy their identity and voice without them even having to be in the movie/song.  And in the midst of all this tech, do we really understand what these AI tools are doing? It’s crucial to have clear communication and consent, so everyone knows what they’re signing up for? As we navigate this AI landscape, it’s vital to strike a balance, ensuring it’s not just a tech thrill ride but a fair, transparent, and responsible journey for everyone involved at the university level.

What might you use AI tools for moving forward? What would you not use them for?

As I currently find myself using AI for a variety of things, I feel like there is a wider variety of things moving forward that AI could be useful for. Using ChatGPT to kickstart writing projects, summarize information, or create basic outlines as I continue my schooling I also think it would be interesting to utilize AI tools to compile resource lists, summaries, or explanations on complex topics Using AI applications like Duolingo’s Roleplay for practicing real-world conversations

Alternatively, AI tools, while helpful, should not be relied upon as substitutes for independent thought and innovative ideas. I also obviously believe that Academic assessments should reflect genuine understanding and effort, not just AI-generated content.

Where do you think these tools will be in their evolution in 2-3 years’ time?

While the evolution of AI might be exciting, with all of the advances its already made it definitely feels a little bit off-putting. Some pros of the evolution of AI include the fact that AI tools are likely to improve their understanding of context, allowing for more nuanced and accurate responses. This could involve a better grasp of user intent and a reduction in instances of generating misleading or irrelevant information. Additionally, the integration of AI tools with AR and VR technologies may offer immersive and interactive learning experiences. This could be particularly beneficial in educational settings, allowing users to engage with AI-generated content in three-dimensional spaces. I can also see the potential of the future, seeing increased emphasis on collaboration between humans and AI. AI tools could serve as collaborative partners, aiding individuals in creative processes, problem-solving, and decision-making. However, on the downside, I can see in the future there being a lot of reliance on AI and using it for worse instead of better, like what I mentioned before with things like deepfakes. I just think there is a fine line between what we should and shouldn’t use AI for.

What examples have you seen of good data visualization?

One really good example of data visualization I have seen is a website called The Pudding. I found this website a couple of years ago when I was doing a research project, and I found the way that it represented statistics and data to be unique. The Pudding is known for its innovative and visually appealing data visualizations. The team combines data with creative storytelling to present complex information in a compelling and accessible manner. The website also covers a wide range of topics, from social issues and cultural trends to economics and technology. This diversity allows audiences with various interests to find engaging and informative content. Many of The Pudding’s visualizations are interactive, allowing users to explore data and draw their own conclusions. This interactive approach enhances user engagement and understanding of the presented information. The Pudding also doesn’t just present data; it provides in-depth analysis and context for the visualizations. This helps users gain a deeper understanding of the issues or trends being explored. The combination of data visualization and storytelling is a distinctive feature of The Pudding. The narratives woven into the visualizations make the content more relatable and impactful. The website is also completely designed with user experience in mind. Navigating through the content is intuitive, and the visualizations are presented in a user-friendly format, making it easy for visitors to explore and enjoy. The Pudding’s visualizations often serve an educational purpose, helping users understand complex issues through data. This makes the website a valuable resource for students like me, educators, and anyone interested in learning from data-driven narratives.

In the example, Income Mobility Charts from this module’s Read/Watch section, the data is actually moving as you watch it. How does that impact your understanding of the data? What would have been lost if they had chosen to use static charts instead?

The dynamic nature of the Income Mobility Charts, where the data is presented in a moving format, significantly enhances the viewer’s understanding of the data. The interactive element allows users to witness changes and trends over time, providing a more comprehensive and nuanced comprehension of the information. This dynamic presentation is particularly valuable for conveying the evolution of income mobility patterns and capturing the temporal aspects of the data.

If static charts were chosen instead, several key benefits of the dynamic presentation would have been lost. Static charts, while useful for capturing a snapshot of the data at a specific point, lack the ability to illustrate transitions and trends over time. The dynamic charts, by contrast, offer a more immersive experience, enabling viewers to see the data unfold and grasp the temporal dynamics of income mobility. The movement adds a layer of storytelling that enhances the narrative and allows for a more engaging exploration of the subject.

In essence, the choice to use dynamic charts enhances the communicative power of the visualization, providing a more vivid and interactive representation of the data that goes beyond what static charts could achieve.

References

Stable Diffusion. (November 18, 2023). AI Image Generator https://stablediffusionweb.com/#ai-image-generator

 The Pudding. (November 22, 2023) https://pudding.cool/

Comments on Peers Blog Posts:

Module 4: Principles of Learning Design & Active Learning

Throughout this module, I comprehensively understood learning design principles and the practical application of active learning strategies. This learning journey allowed me to explore the intricacies of H5P, delve into the realm of active learning, meticulously construct a lesson plan, and engage in thoughtful reflection regarding my educational experiences. This module broadened my learning and enabled me to put these principles into practice effectively.

HP5

Lesson Plan

Exploring Healthy Eating Habits for Kids

Overview:

In this engaging lesson, we’ll embark on an exciting journey to explore the world of healthy eating for kids. We will delve into why making nutritious food choices is vital, how it influences our bodies, and the reasons behind consuming a variety of foods. This lesson serves as a foundational step in our quest for better nutrition and a healthier lifestyle. To kick-start our lesson, let’s watch an interactive video that will introduce us to the concept of healthy eating for kids. This video will not only make learning fun but also create a strong teaching presence in our course.

Lesson Objectives:

By the end of this lesson, learners will be able to:

  1. Understand the significance of maintaining healthy eating habits in their daily lives.
  2. Identify and appreciate the benefits of consuming a diverse range of foods.
  3. Explain how proper nutrition has a positive impact on their overall well-being, growth, and energy levels.

Read/Watch:

Video: We’ll watch an entertaining animated video titled “Healthy Eating: An introduction for children aged 5-11” This video talks about the importance of eating healthy food like fruits and vegetables, and why they are important for our health and happiness

Read: In addition to the video, we’ll read a beautifully illustrated and child-friendly book called What’s on My Plate?: Choosing from the Five Food Groups” This book will introduce us to the five food groups in an engaging way.

To ensure our learners are well-prepared to meet the learning objectives and understand the broader context of healthy eating, we’ll provide additional information on:

  • The five food groups: Fruits, Vegetables, Grains, Protein, and Dairy. We will delve into what each group provides for our bodies and why they’re all equally important.
  • Basic nutritional concepts: We’ll introduce the concepts of vitamins and minerals, explaining how they help us grow, stay strong, and maintain our energy levels. We will also introduce the concept of the food pyramid and how it helps us visualize a balanced diet.

Application:

Our young learners will actively apply their newly acquired knowledge and skills through exciting activities. They will:

  • Complete the HP5 activities attached to this module.
  • Create a “Rainbow Plate” collage using magazines, where they will draw, cut out, and paste pictures of different colorful foods representing each of the five food groups.
  • Play the role of nutrition experts and plan a healthy meal for a fictional character, making sure it includes items from each food group. This activity will encourage them to think critically about the balance of their meals.
  • Engage in a classroom discussion, sharing their meal plans with classmates and explaining the reasoning behind their choices. This collaborative activity will foster active communication and problem-solving skills.

Reflection:

We recognize that reflection is a vital part of the learning process. Our learners will engage in self-reflection by:

  • Sharing what they found most fascinating or surprising about the five food groups and their importance
  • Reflecting on how they can apply their newfound knowledge to make healthier food choices at home and in their daily lives.
  • Discussing which food group they consider their favorite and why it appeals to them. This will help them develop a personal connection to the concept of healthy eating.

To Do This Week:

To ensure a structured and scaffolded learning experience, we have prepared a to-do list for our young learners:

1. Watch the video “Healthy Eating: An introduction for children aged 5-11”

2. Read “What’s on my Plate? Choosing from the Five Food Groups .”

3. Create a “Rainbow Plate” collage, incorporating foods from all five food groups.

4. Plan a balanced and nutritious meal for a fictional character.

5. Participate in the class discussion about their meal plans, sharing their choices and reasoning.

References:

Eat Happy Project. (2016, April 27). Healthy Eating: An Introduction for Children Aged 5-11 [Video]. YouTube. https://www.youtube.com/watch?v=mMHVEFWNLMc

Boothroyd, J. (2016). What’s on My Plate? Choosing from the Five Food Groups.


Reflection Questions

What is your experience with video game learning supports? Which principles (Mayer’s and Merrill’s) seem to be commonly applied in in-game support and which ones are often missed in your experience?

Throughout this model, I discovered that a handful of Mayer’s Principles of Multimedia Learning exists throughout online game support. The multimedia principle suggests that learning is more effective when information is presented in visual and auditory formats. In online games, this is often applied through text, graphics, animations, and sound. The contiguity principle emphasizes the importance of presenting related text and graphics close to each other. In video games, this can be seen in placing instructions or tooltips near the relevant in-game elements. The coherence principle suggests that extraneous information should be excluded from multimedia presentations. In video games, it means providing clear and relevant instructions without unnecessary distractions. The modality principle states that information is better understood through narration or audio rather than on-screen text. This principle is relevant when using voiceovers or audio instructions in games.

In terms of Merrill’s Principles of Instruction, there are also many ways these can be incorporated and found in online media and game supports:

  • Activation of Prior Experience: Games often tap into prior gaming experiences, allowing players to build on what they already know
  • Demonstration: Games often show players how to perform specific actions or demonstrate strategies within the gameplay.
  • Application: Players learn by actively participating in the game, applying their knowledge and skills to overcome challenges
  • Integration: Games often provide opportunities for learners to integrate what they’ve learned into real-world contexts within the game.

In video game learning support design, these principles are often applied to varying degrees. For instance, many educational games incorporate multimedia elements to enhance engagement and understanding. They aim to demonstrate concepts and provide opportunities for active participation and problem-solving. However, the practical application of these principles can vary based on the specific game, its intended learning outcomes, and the expertise of the instructional designers. One principle that might be missed in some multimedia games is the coherence principle, as some games can become overly complex or cluttered with information, making it challenging for learners to focus on what’s truly relevant. Additionally, not all games effectively activate prior experience, especially if the game’s content is entirely new to the player.

Ultimately, I found that applying these principles in video games for learning can vary widely. Still, the most effective educational games strive to integrate these principles to create engaging and educational experiences.

Where do you see constructive alignment and backward design used in this course or another course you are taking/have taken? Is there anywhere where it seems to be missing?

In my current courses, I often see constructive alignment within the course’s intended learning outcomes as they are clearly defined at the beginning. These outcomes specify what we students are expected to know, understand, or be able to do by the end of the course. I often also see constructive alignment within the teaching strategies among my professors, including lectures, discussions, group work, and assignments designed to help students achieve the learning outcomes. They align with the skills and knowledge students need to develop.

Regarding backward design,  it is also often shown when the course begins with a clear definition of the desired learning outcomes. These outcomes are specific, measurable, and aligned with the course’s goals.

Constructive alignment and backward design are valuable frameworks for effective course design, but their application can vary. They may be missing or less effective in courses when course learning outcomes are not well defined or measurable, and aligning assessments and activities effectively becomes challenging. I can also see how courses heavily relying on traditional lecture-style teaching without clear connections between content, outcomes, and assessments may lack effective constructive alignment. Sometimes, assessments may not align well with the stated learning outcomes, leading to misalignment.

Effective course design incorporates constructive alignment and backward design principles to create a clear and meaningful learning experience for students. It ensures that what students learn, how they learn, and how they are assessed all work together to achieve the course’s educational goals.

Historia, the example of game-based learning in this week’s Read/Watch list is relatively low tech – how would you use multimedia tools and content to support and enhance the active learning? What would it allow them to do that they’re not doing right now?

In my experience, enhancing a relatively low-tech game-based learning example like “Historia” with multimedia tools and content can transform the learning experience into something engaging, interactive, and educational. It’s not just about adding bells and whistles; it’s about opening doors to new ways of learning that weren’t possible with the low-tech game alone.

For instance, incorporating interactive multimedia maps and timelines could allow students to dive deeper into historical events. They could explore the contexts visually, zoom in on specific regions, and see how different events are interlinked geographically and chronologically. It’s like unfolding history on a dynamic canvas, where they can connect the dots in ways they couldn’t with static text-based content alone. When you introduce historical documentary clips or animated videos, history comes alive. It’s as if you’re transported back in time, witnessing the events, feeling the emotions, and immersing yourself in the cultures and environments of the past. It’s a richer, more multi-sensory experience that deepens your connection to history.

I think integrating augmented reality (AR) or virtual reality (VR) is a really fun possibility. These technologies enable you to enter historical settings, interact with the people of that era, and experience history firsthand. It’s a powerful tool for making history memorable and engaging, as it engages your mind and your senses. These multimedia elements enhance the learning experience by making it more dynamic, immersive, and reflective. It goes beyond the limitations of a low-tech game like “Historia” by allowing students to actively participate, visualize, and experience historical content more vividly and meaningfully. It’s about bringing history to life and fostering a deeper appreciation for the past.

How have you found the balance of passive and active learning in this course for your learning? How does it compare to your experience in other courses?

In my experience as a learner, I’ve found that passive learning activities in courses often encompass activities like reading course materials, watching video lectures, and listening to audio content. These passive elements serve as a fundamental way to introduce students to new knowledge, theories, and key concepts. They provide the groundwork upon which further learning is built.

On the flip side, active learning engages students in ways that require active participation and interaction with the course content. These activities include discussions, group projects, problem-solving exercises, and interactive simulations. Active learning encourages critical thinking, problem-solving, and applying acquired knowledge to real-world scenarios. It’s where we truly internalize and make sense of what we’ve learned passively.

The balance between passive and active learning can significantly vary from one course to another in my experience. Some courses begin with a heavy emphasis on passive learning to establish a solid foundation. As the course progresses, they gradually transition into more active learning activities, allowing students to apply their foundational knowledge practically.

In contrast, some courses opt for a blended approach, seamlessly weaving passive and active learning throughout the entire learning experience. This approach fosters an interactive and engaging learning environment, ensuring that students are consistently challenged to think critically and apply what they’ve learned.

I personally believe that striking the right balance between passive and active learning is paramount. The ideal balance should always align with the course objectives and the nature of the subject matter. Some courses initially necessitate a more passive approach, allowing students to grasp essential concepts. Others should emphasize active learning from the beginning, particularly those emphasizing problem-solving, critical thinking, and application. This balance is crucial to delivering effective and meaningful learning experiences that cater to diverse needs and learning styles.

What was your experience of trying out H5P? Which of the activities do you think you would make most use of in your teaching context and what would you use them to do? Which ones do you think require the most resources to create?

I actually kind of disliked the H5P experience. I found those activities really challenging to develop. Maybe if I had more time to play around with it, I would have enjoyed it more. However, I found it to be challenging. In terms of teaching, especially in today’s technologically advanced world, there are much easier ways to make interactive content online engaging. The experience of HP5 felt a bit outdated, and I feel teachers could probably find easier and more fluid ways for their students to engage. I am glad it was something I got to try out because I am always trying new things in this course, and I think that’s what’s most important; it was just not something I immensely enjoyed.

In the reading, Students Need to DO Something, do any of the author’s experiences with passive learning in K-12 classrooms resonate with your own? Why do you think active learning is not more prevalent in K-12? Have you tried using any of these activities in a classroom? Which one looks most appealing to you?

In the reading “Students Need to DO Something,” the author’s insights into the prevalence of passive learning in K-12 classrooms resonate with what I’ve come to understand about traditional K-12 education. Passive learning methods like teacher-centred instruction, lectures, note-taking, and reliance on textbooks are often the norm.

I believe several factors contribute to the limited use of active learning in K-12. First, many educators and schools continue to rely on time-tested traditional teaching methods, sometimes hesitant to embrace newer approaches. Additionally, the adoption of active learning can be hindered by resource constraints. It may demand more technology, teacher training, and access to suitable materials than some schools and districts can readily provide. I also recognize the persistent emphasis on standardized testing in today’s educational landscape. This can inadvertently lead to overemphasizing content delivery and rote memorization, potentially leaving less room for active learning.

Furthermore, the time constraints in K-12 education often press teachers to cover a predetermined curriculum within a limited timeframe, making it challenging to integrate more active learning.

In my opinion, numerous active learning methods could greatly benefit K-12 classrooms. Encouraging student-led discussions and debates, promoting collaborative problem-solving through project-based learning, inviting students to step into historical or scientific roles, and applying knowledge to real-life scenarios are all promising approaches. Among these, I find activities that revolve around real-world problem-solving particularly compelling. They offer students the opportunity to apply what they’ve learned to practical situations, fostering critical thinking, nurturing creativity, and honing exceptionally relevant skills for their future. Such problem-solving activities have the potential to make learning not only more engaging but also more meaningful, a crucial aspect of K-12 education, in my opinion.

Can you describe (step by step) an example of scaffolding in a learning experience that you’ve designed or experienced?

Last year I actually taught a health education class at Campus View Elementary School, and for that lesson plan, we had to create it using the scaffolding technique. Here is the lesson plan that I developed for that class:

Step 1: Introduction

  • Set the Learning Objective –  Define the learning objective, which is to understand the importance of sleep hygiene for overall well-being.
  • Assess Prior Knowledge – Begin by asking students what they already know about sleep and its impact on health through a class discussion or pre-assessment.

Step 2: Explicit Instruction

  • Lecture and Visual Aids – Start with a teacher-led lecture that introduces the concept of sleep hygiene. Use visuals, such as diagrams and infographics, to explain the components of sleep hygiene.
  • Chunk Information – Break down the components of sleep hygiene into manageable “chunks” to prevent cognitive overload.
  • Modeling – Demonstrate how to create a sleep diary, emphasizing the importance of tracking sleep patterns and behaviors.

Step 3: Guided Practice

  • Provide Sleep Diaries – Distribute partially completed sleep diaries that include prompts for recording bedtime, wake time, and sleep quality. Students can use these templates to practice tracking their sleep.
  • Guided Diary Entries –  Guide students through the process of filling out the sleep diaries, explaining how to assess their sleep patterns and identify areas for improvement.
  • Frequent Checks for Understanding – Ask questions and engage students in discussions to ensure they comprehend the concept of sleep hygiene and how to monitor their sleep habits.

Step 4: Independent Practice

  • Individual Sleep Diaries –  Encourage students to create their own sleep diaries independently. They should be responsible for tracking their sleep patterns and habits for a specified period.
  • Differentiated Support – Provide additional resources or guidance to students who may need it, such as offering tips on improving sleep quality or addressing specific sleep-related concerns.

Step 5: Peer Collaboration

  • Peer Review – Have students exchange their sleep diaries with a partner for review. Partners can offer feedback and suggest strategies for better sleep hygiene.
  • Discussion – Facilitate a class discussion where students share their experiences with tracking their sleep and the insights they’ve gained.

Step 6: Assessment and Feedback

  • Formative Assessment: – Administer a short quiz or have students write a reflection on their sleep hygiene practices, based on what they’ve learned.
  • Feedback –  Provide constructive feedback on the sleep diaries and assessments, focusing on areas for improvement and reinforcing good sleep hygiene practices.

Step 7: Application

  • Real-World Application – Discuss real-life scenarios in which understanding and practicing good sleep hygiene are essential, such as how it affects academic performance, mood, and overall health.
  • Extension Activities – Encourage students to apply their knowledge by creating a personalized sleep hygiene plan, including strategies for improving their sleep habits.

Step 8: Summative Assessment

  • Summative Assessment – Conduct a final assessment or project, such as having students create a presentation on the importance of sleep hygiene and how to maintain it for optimal health.

Step 9: Reflection and Discussion

  • Reflect and Discuss – Engage students in a reflective discussion about their experiences with tracking sleep habits, what they’ve learned about sleep hygiene, and how they plan to apply this knowledge in their daily lives.

This scaffolded learning experience gradually empowers students to take ownership of their sleep hygiene while receiving guidance and support. It starts with explicit instruction, transitions to guided and independent practice, involves peer collaboration and formative assessment, and culminates in a summative assessment and a reflective discussion about the significance of sleep hygiene for their well-being.

References:

Eat Happy Project. (2016, April 27). Healthy Eating: An Introduction for Children Aged 5-11 [Video]. YouTube. https://www.youtube.com/watch?v=mMHVEFWNLMc

Boothroyd, J. (2016). What’s on My Plate? Choosing from the Five Food Groups.

­­Assignment 2: Video for a Learning Purpose

The “Video for a Learning Purpose” assignment provided a unique avenue for me to amalgamate the skills I’ve acquired from modules 1, 2, and 3 into the creation of an instructional video. This endeavor was more than just an assignment; it was a delightful journey into crafting an instructional video for the very first time. The experience allowed me to unleash my creativity while ensuring that the video served an educational purpose. Below, you’ll find an introduction, a YouTube link to access my video, reflection questions, a storyboard, an audio/visual script, and an audio script.

My video link : https://www.youtube.com/watch?v=StMn4JCm8ik

Reflection Questions

What is the learning purpose of your video?

For my learning video, I chose to show the audience how I make my favorite smoothie. Smoothies are a really easy way to get some substance when you are on the go and the one I love to make is both healthy and scrumptious! I have always loved recipe videos and thought I would try one out.

Which of the principles we’ve covered this term (e.g., Mayer/Universal Design for Learning/Cognitive Load Theory) did you incorporate into your design and why?

In crafting the video, I strategically applied several key instructional principles to optimize the learning experience:

Segmenting Principle – To prevent overwhelming the learner, I broke down the content into manageable steps, steering clear of information overload. This approach allowed for a smoother and more digestible learning process.

Pre-training Principle – I recognized the importance of building a strong foundation for learning. Consequently, I included an informative introduction and a list of prerequisites for the learner to prepare before delving into the video. This ensured that the viewer started with a clear understanding of what to expect.

Modality Principle – To facilitate comprehension, I harnessed the modality principle. By not only explaining the steps with my voice but also physically demonstrating them, I appealed to different learning styles. This multi-faceted approach aimed to make the instructional content more accessible and engaging.

Multimedia Principle – Recognizing the power of utilizing multiple mediums for learning, I embraced the multimedia principle. Through the harmonious combination of narration and video, I followed the dual coding theory, ensuring that both auditory and visual channels worked in unison. This orchestrated approach aimed to deliver an optimal learning experience, reinforcing the content in a comprehensive and engaging manner.

By weaving these principles together, I endeavored to create a video that was not only informative but also accessible and engaging, catering to a diverse audience of learners.

Additionally, In a concerted effort to ensure the accessibility of my video for all students, I thoughtfully integrated a range of features and elements. These enhancements were meticulously designed to cater to diverse learning needs and preferences:

Custom Captions – To bolster the learning experience and enhance the clarity of my speech, I diligently crafted custom captions. These captions serve as a valuable aid, making the content more accessible and comprehensible to all viewers.

Text-to-Speech Script – Recognizing the importance of inclusivity, I diligently compiled a comprehensive script detailing not only my spoken words but also my actions. This text-to-speech script empowers learners who rely on screen readers, ensuring they can access the content effectively.

YouTube Controls – Leveraging the capabilities of the YouTube platform, I provided learners with a suite of controls. These include the ability to pause, play, rewind, fast forward, and adjust the playback speed. These features grant viewers the flexibility to tailor their viewing experience to their individual needs, ensuring a user-friendly and adaptable learning environment.

By incorporating these accessibility features, I aspired to make the video a welcoming and inclusive educational resource, fostering an environment where every student can engage with the content comfortably and effectively

What was challenging about capturing your own video?

In all, this assignment presented a unique set of challenges for me, primarily due to my limited prior experience in creating this style of video. While I had previously worked with screen captures, this project required me to step into the role of an actor, a relatively uncharted territory for me. The process, I must admit, proved to be quite demanding and time-consuming. My intention was to meticulously plan every aspect, leaving no room for reshoots. This demanded extensive preparation, involving a series of sequential steps, which encompassed script and storyboard creation, script rehearsal, mastering the video editing software, actual filming, editing, audio caption creation, and the video’s upload.

In addition to the core content, I endeavored to enhance the video’s educational value by integrating text and images onto the screen. However, I encountered a perplexing issue during the uploading process. For reasons I’ve yet to decipher, each attempt to upload the video to YouTube resulted in the disappearance of all the text I had meticulously added. This proved to be a source of significant frustration, as it stripped away a valuable visual element that I had invested considerable time and effort in. Regrettably, this issue remains unresolved, leaving my video without these intended visuals.

What did you find easiest?

Surprisingly, the process of adding captions to my video turned out to be the smoothest and most straightforward aspect of this project. Initially, I anticipated it to be a challenging task, envisioning a manual transcription effort. However, I stumbled upon a website that allowed me to upload my video and automatically generated accurate captions. To my delight, these captions seamlessly synchronized with the audio content, aligning perfectly with what I was conveying in the video. This discovery not only simplified the process but also enhanced the overall convenience of the captioning task.

How would you approach capturing video differently next time?

For future video capture projects, I would adopt a more structured and streamlined approach to improve efficiency and quality. If I were to do this again I would invest more time in the planning phase. I observed that my script came across as mechanistic or artificial. I believe that with additional practice, I could have identified and rectified this issue.

I would have liked to troubleshoot the issue with text and image disappearing during upload by experimenting with different video formats or platforms. I would have also liked to explore ways to incorporate interactive elements into the video to engage the audience more effectively. This might mean filming a different learning outcome; one that includes more participation.

Supporting Material

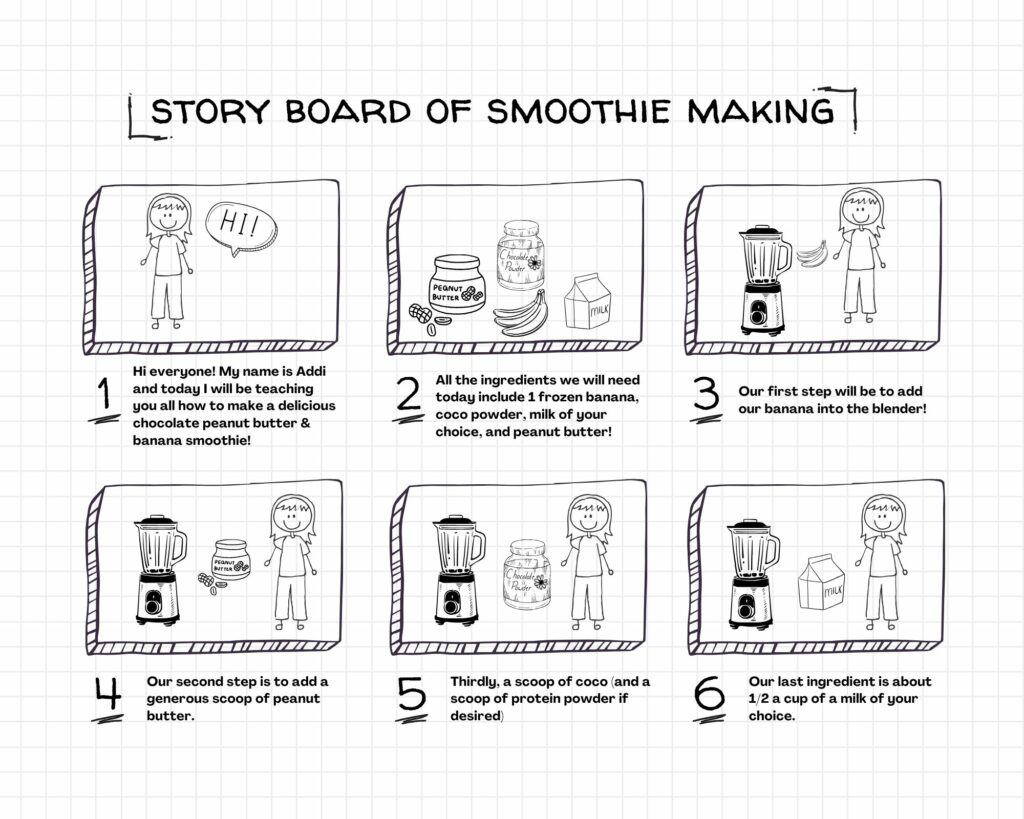
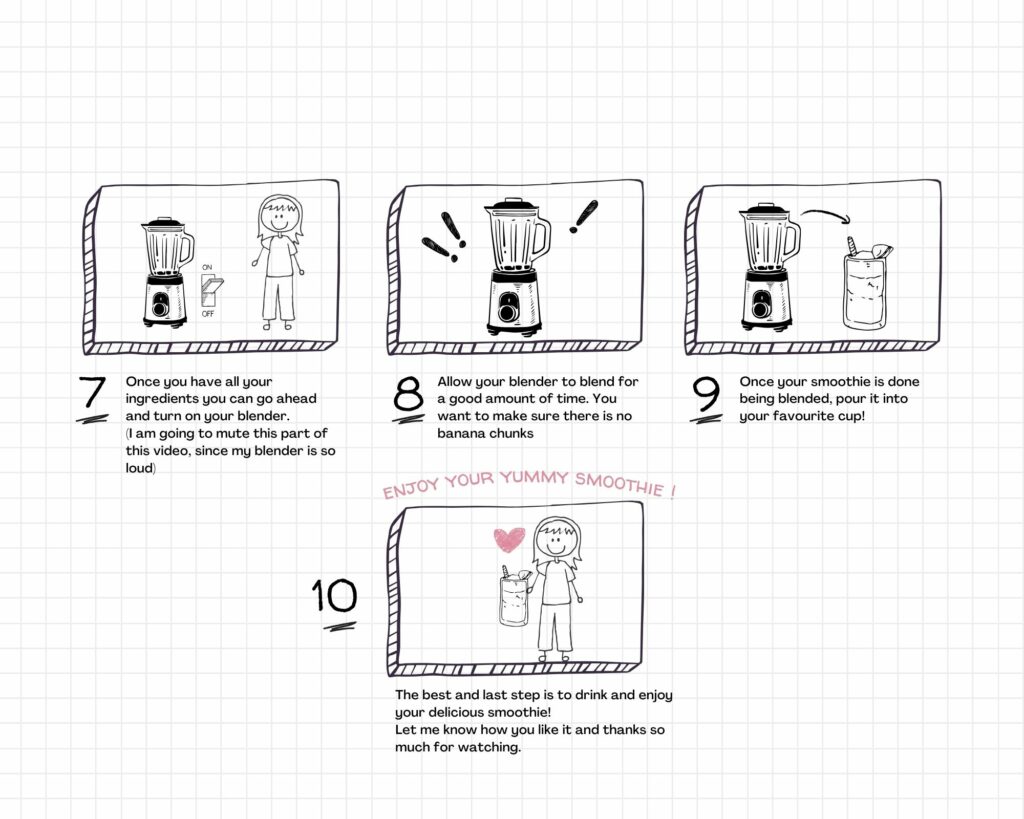
Story Board

Audio/Visual Script

Hi. My name is Addi, and today I’m going to teach you how to make a delicious
chocolate, peanut butter and banana smoothie.

All right, so the first step is getting all of your ingredients together.
So everything that you’re going to need for this smoothie includes:
• One banana – Mine is frozen, but you don’t have to use a frozen one.
• Peanut butter of your choice,
• cocoa powder of your choice,
• milk of your choice.

[Addi shows all of the ingredients individually]

And then for me, I add in a scoop of protein powder. But that is not necessary if you don’t want that.

So our first step is to get everything into the blender.
The first thing we’re going to add into the blender is one frozen banana.

[Addi adds banana into the blender]

Now that we have our banana in, the second thing we’re going to add is one big scoop of cocoa powder.

[Addi adds cocoa powder into the blender]

The next step is one big scoop of peanut butter.

[Addi adds peanut butter into the blender]

Next step is to add a scoop of protein powder.

[Addi adds protien powder into the blender]

You can skip this step if you want to, but I like it, so I’m going to add a bit.

The next step is to do about a half a cup of a milk of your choice. So I’m using Oat Milk

[Addi adds oat milk into the blender]

Once all that’s in, you can go ahead and close up your blender and blend it up really good.

Now, I’m going to mute this part of the video because my blender is super loud, but stay tuned till the end.

[Video is muted, Addi tuns on blender]

You want to make sure that you blend up your smoothie really, really well so that there’s no banana chunks left in there, because that’s happened to me before.

Now that it’s all finished, the last step is to find your favorite cup and pour your smoothie in.

[Addi pours smoothie into cup]

Now you have a delicious smoothie to go and enjoy.

Thanks for listening. Bye.

References

Mayer’s 12 Principles of Multimedia Learning. (2023, June 2). Digital Learning Institute. https://www.digitallearninginstitute.com/blog/mayers-principles-multimedia-learning/

Module 3: Storytelling

During this module, I had the valuable opportunity to delve into the application of storytelling as a potent tool to elevate the learning process. It became apparent to me that storytelling is an inherently human experience, deeply ingrained in our nature. This innate attraction to storytelling is evident in our profound affinity for books, movies, and the rich tapestry of family stories that have been passed down through generations. Throughout this module, I’ve had an eye-opening revelation: storytelling isn’t just a form of art; it’s a powerful tool that can revolutionize the way we learn. It’s a testament to our deep-seated love for stories and the realization that we can leverage this innate connection to make learning more immersive and effective. In a world saturated with information, storytelling offers a refreshing approach that enables us to forge deeper connections with the subject matter. This newfound awareness has ignited my curiosity, and I’m enthusiastic about further exploring the multifaceted potential of storytelling as a dynamic instrument for learning and communication.

Experiences with Twine
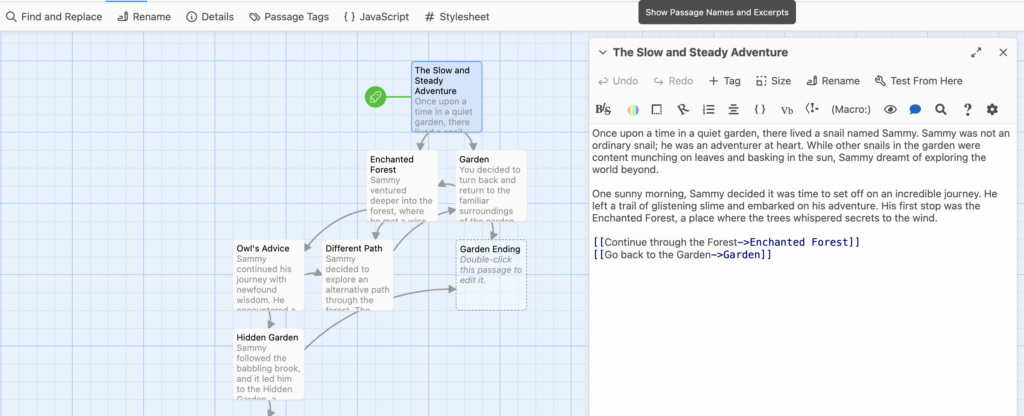
Twine is a unique storytelling application that empowers users to craft interactive narratives in the “choose your own adventure” style. To get started with Twine, I delved into the realm of online tutorials, YouTube videos, and web resources to grasp the intricacies of story creation within this platform. Initially, I found it a tad perplexing, but as I grew more acquainted with Twine’s capabilities, I embarked on my creative journey. My chosen narrative revolved around a charming little snail embarking on a captivating adventure across diverse landscapes. Crafting this story in Twine proved to be an enjoyable and engaging experience, offering a platform to weave a tale enriched with choices and branching pathways. While my initial foray into Twine was a learning experience, I see great potential in this tool for crafting intricate and immersive stories. With more time and dedication, I look forward to revisiting Twine in the future, and exploring the boundless possibilities it offers for creating interactive narratives.

I have attached some screenshots and my twine story below!

https://twinery.org/2/#/stories/1f8c98c6-6a38-4804-aa5c-a5db1e84d5c7

Reflection Questions
Describe a meaningful learning experience that started with a story that you heard. What made it impactful for you? What senses did it appeal to? Did you recognize any of the storytelling techniques reviewed this week?

Growing up, I was really close with my Uncle Ken. It was always like having a second Dad. His career and lifelong passion was being a stunt pilot in Aerobatics. Some of my favorite stories were the ones he told me about how he’d held onto his dreams with unwavering determination, despite the recognition of the inherent dangers. As I listened to his tales, I found myself drawn into his world of daring aerobatics and the exhilaration of soaring through the open skies. He would tell the stories of new stunts he was trying, a scene so vividly described that I could almost hear the roar of the engines and feel the rush of the wind against my face. His storytelling technique of creating a vibrant mental picture that appealed to my senses was captivating. But as his stories progressed, so did the realization of the risks involved. My uncle vividly recounted the moments of doubt, of acknowledging the inherent danger in his chosen path. He spoke of the weight of responsibility he carried as he trained, knowing that the line between success and disaster was perilously thin. It was at this point that the storytelling technique of creating suspense and tension became evident, much like the edge-of-the-seat moments in a thrilling movie. Yet, for me, what made this story truly impactful was the lesson he shared. He described the pivotal moment when he questioned whether to continue his pursuit or to take a safer, more conventional path in life. He spoke of the conversations with family and friends who worried about his safety. And he described the sleepless nights spent wrestling with his own fears. As he recounted these struggles, I felt a profound connection to his journey, as if I were experiencing it alongside him. The emotional authenticity of his storytelling resonated deeply, and I could sense the weight of his decisions, appealing to my empathy and understanding. In the end, he made a choice that some might call reckless, while others might see as courageous. He followed his dream and became a stunt pilot. My uncle’s story was not just about the pursuit of a career but about the pursuit of one’s passions, even when the path is perilous.
The storytelling techniques he used, such as vivid descriptions, suspense, and emotional authenticity, made the story impactful. Through his narrative, I learned that pursuing a dream, even when it seems dangerous, can lead to a life filled with purpose and fulfillment. This was a meaningful learning experience that started with a story and left me with a profound understanding of the importance of following one’s dreams, no matter how challenging the journey may be.

In the reading this week, 7 Storytelling Techniques Used by the Most Inspiring TED Presenters, which of the presenters did you find most compelling? What technique(s) did you recognize in their talk?

I found three stories from TED Talks that stood out to me due to their compelling narratives and effective storytelling techniques. Each story brings unique insights and engages the audience through personal experiences and relatable descriptions.

The first story that deeply resonated with me was Leslie Morgan Steiner’s account of her experience in an abusive relationship. She courageously shares her personal journey, shedding light on the complexities of domestic violence and the challenges victims face when trying to break free from such situations. Steiner’s storytelling technique is emotionally engaging, as she opens up about her fear and shame during the abusive relationship. This vulnerability adds authenticity to her story and makes it relatable to the audience. Her talk’s captivating start, where she shares a shocking fact about her experience, immediately draws viewers into her narrative. Additionally, her use of vivid descriptions allows the audience to visualize her emotions and experiences, providing a deeper understanding of her perspective.

The second compelling story comes from Zak Ebrahim, who shares his deeply personal experiences and emotions related to his family’s background and his father’s involvement in terrorism. His narrative style is emotionally impactful as he opens up about his inner struggles, fear, and the heavy burden he carried as the son of a terrorist. Ebrahim’s vulnerability adds authenticity to his story, connecting with the audience on an emotional level. His TED Talk serves as a moving example of how personal storytelling can address complex and sensitive topics, promoting peace and encouraging the audience to explore alternative paths to reconciliation and understanding.

The third story that left a lasting impression on me is Malcolm Gladwell’s exploration of choice and diversity in the context of food preferences. Gladwell challenges the notion that there is a one-size-fits-all answer to making choices, especially when it comes to food. He highlights the food industry’s understanding that people’s preferences vary and that the key to success is embracing diversity and customization. Throughout his talk, Gladwell employs vivid and relatable descriptions to help the audience visualize the concepts he discusses. For instance, he characterizes variations in spaghetti sauce preferences as “vibrant, infinitely diverse, and irreducible.” His narrative style presents contrasting ideas and challenges conventional wisdom, emphasizing the value of diversity in preferences.

In all three stories, the speakers use personal experiences, emotional authenticity, engaging openings, vivid descriptions, and relatable contrasts to make their narratives compelling and thought-provoking. These storytelling techniques effectively convey their messages and create memorable presentations.

What storytelling techniques have you used instinctively and which ones require more work for you? Which techniques will you focus on moving forward?

I find that I naturally gravitate toward Mayer’s Personalization Principle when I engage in storytelling. I consider myself an open individual who values sharing personal anecdotes. Personalization, I believe, serves as a powerful connector, forging meaningful bonds among people and presenting information in an engaging and relatable manner. Storytelling, in particular, is a passion of mine. Furthermore, I often adopt a conversational tone in my storytelling, aligning with the principles of personalization. This approach helps create an intimate connection with my audience, making the narrative more accessible and relatable.
However, I recognize that there are areas in my storytelling that I can refine. One aspect is adhering to the principles of Mayer’s segmentation, where keeping stories concise and to the point is vital to maintaining the audience’s attention. While I enjoy providing rich details to paint a vivid picture, there are instances where I may unintentionally extend the narrative, potentially affecting its impact. Incorporating visual components, as suggested by Mayer’s Signaling Principle, is another area where I believe I could improve. Visual aids can significantly enhance the storytelling experience, and I acknowledge that I may not always give due consideration to this aspect, especially when verbally sharing stories.
Moreover, I’ve become more aware of the importance of adhering to the Universal Design for Learning principles. While I may not personally require specific adaptations, I understand the significance of ensuring that my storytelling is inclusive and accessible to all. I am committed to becoming more proficient at integrating these adaptations into my narratives, acknowledging that they may be essential for some members of the audience.
In summary, I’m drawn to the personalization principle, incorporating personal stories and a conversational tone in my storytelling. Yet, I aspire to enhance my storytelling by practicing the segmentation and signaling principles and by embracing the Universal Design for Learning principles to make my narratives more inclusive and impactful.

References

Mayer’s 12 Principles of Multimedia Learning. (2023, June 2). Digital Learning Institute. https://www.digitallearninginstitute.com/blog/mayers-principles-multimedia-learning/

Module 2 – Design Principles for Effective & Accessible Multimedia

In this module, I enjoyed exploring design principles for effective and accessible multimedia, and it was a truly enjoyable experience. This module allowed me to delve into the world of accessibility in design, unveiling the hidden complexities of living with a disability. As I currently work with kids with a wide variety of abilities, I am always looking for new ways to broaden my awareness of the intricate challenges that people with disabilities face regularly.

Furthermore, this module provided insights into creating effective PowerPoints and infographics. As someone naturally inclined toward creativity, the guidelines for crafting multimedia content boosted my confidence and allowed me to refine and practice my skills. It served as a platform to further hone my creative abilities and enhance my prowess in producing engaging and impactful visual materials.

My journey through Module 2 not only deepened my understanding of accessibility and its importance but also provided me with valuable tools to enhance my multimedia creation skills. It underscores the transformative potential of education in expanding horizons and empowering individuals to leverage their inherent creativity for the benefit of all.

Reflection Questions

What did you find when you ran the WAVE accessibility report on your blog post(s)? What did you expect, and what was surprising? Is there anything you will do differently going forward?

Running a WAVE accessibility report on your learning materials can be an eye-opening experience. It’s incredible how seemingly minor design choices can profoundly impact accessibility. The surprise often comes when you see just how many areas need improvement, such as contrast issues or missing alt text for images. It reinforces the importance of considering accessibility from the outset of the design process and not as an afterthought. I found that my site did indeed have accessibility issues, which I was surprised by as this was not something that I had thought about while writing my blog posts. What struck me the most was how small oversights, like insufficient contrast or missing alt text, can inadvertently exclude learners. It’s a reminder that accessibility isn’t an optional feature but an essential aspect of creating equitable learning experiences. Going forward, I’d make it a priority to ensure that my materials are not only visually engaging but also inclusive and accessible to all learners.

I’ve found text-to-speech tools to be quite valuable for individuals with visual impairments and for various learning styles. Trying out different voices highlights the significance of voice quality and pacing in facilitating information absorption. Observing how the narrator’s voice can affect the learning experience is fascinating. I tried out multiple voices, from Snoop Dog to robots, which made me reflect on how technology can bridge accessibility gaps and cater to various learning styles. It’s a testament to the power of inclusive design to make education more accessible and enjoyable.

Have you used Text to Speech tools before? Did you find it useful? Did you try out some of the different voices? What impact did the different voices have on your ability to absorb information?

The role of media and multimedia in a Universal Design for Learning (UDL) framework is profound. They provide multiple means of representation, engagement, and expression, making learning more flexible and personalized. What’s particularly intriguing is how practices for creating accessible text, images, and video align seamlessly with UDL principles. It underscores the idea that good design and accessibility often go hand in hand, ensuring learners of all abilities can access and engage with content effectively.  It’s a reminder that education should be adaptable, embracing the diversity of learners. When used thoughtfully, media and multimedia provide avenues for customization and engagement. I personally greatly appreciate video captions, as they enable me to comprehend individuals speaking with accents I’m not accustomed to, and also help me with word spellings and allow me to keep up on anything I might miss. What strikes me as particularly powerful is how the best practices for creating accessible media align seamlessly with UDL principles. UDL encourages presenting information in multiple ways to cater to diverse learning styles and acessible media, such as captioned videos, audio descriptions, and transcripts, provide alternative ways to access content beyond traditional visuals and audio. This benefits not only individuals with disabilities but also those who prefer different learning modalities. It reinforces the idea that designing for accessibility isn’t an extra step; it’s an integral part of making our lessons and designs.

What does inclusive design mean to you?

Inclusive design is more than a set of guidelines; it’s a philosophy that shapes how we approach education. It means creating a learning environment where every student feels valued and empowered. It’s about recognizing that diversity isn’t a challenge to overcome but a rich tapestry that enhances the educational experience. Inclusivity, to me, embodies the essence of equity and reminds us that our role as educators is to provide opportunities for all learners to thrive.

What do you think the presentations in The World’s Worst Powerpoint Presentations have in common? Which design principles and which other principles (Mayer’s, Inclusive Design, UDL) are they missing?

The humour in “The World’s Worst PowerPoint Presentations” is undeniable but also a moving lesson. These presentations highlight how easily design choices can lead to disengagement and confusion. These presentations tend to be cluttered with excessive text, graphics, and animations. They lack the design principles of simplicity and minimalism. Inclusive Design principles are also overlooked, as a cluttered slide can overwhelm some viewers, including those with cognitive or attention-related disabilities. Overall, these poorly designed presentations often share characteristics such as clutter, inconsistency, excessive text, and a lack of engagement. They tend to neglect design principles like simplicity, consistency, and visual hierarchy, as well as educational principles such as Mayer’s principles of multimedia learning, inclusive design, and universal learning design. As someone passionate about effective communication, it’s a reminder of the responsibility we bear as educators and designers. We must strive for clarity, engagement, and accessibility in our presentations, always considering the diverse needs of our audience.

Which design principles did you use to create your infographic in Canva? Which elements of a ‘good infographic’ were you able to incorporate? What other principles did you consider? What does the template make easier and what does it make harder when creating your infographic?

Creating an infographic is a creative and fun process and a lesson in effective communication. I’ve found that adhering to design principles like alignment and contrast can transform a complex topic into an easily digestible visual. However, I’ve also learned that while templates can streamline the design process, they sometimes limit creative freedom. It’s about finding the right balance between visual appeal and accessibility. I chose to make an infographic on gardening because it was silly and fun. It was nice that they have so many templates that are easy to navigate and fun to use, but I wanted to make my infographic simple and easy to follow. I focused on the accessibility aspects learned in the module and chose to make it uniform. Integrating alternative text for images becomes essential to ensuring inclusivity for those with visual impairments. It’s a reminder that design isn’t just about aesthetics and making information accessible to all.

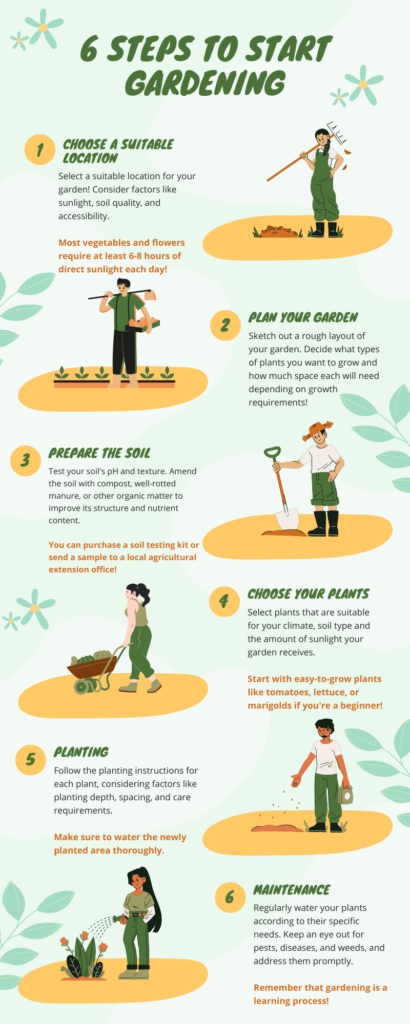
My infographic:

For my infographic alternative text, I would include the following:

An image of an infographic with a light green and yellow colour palette is presented.

6 Steps to Gardening

Step 1: Choose a Location
Alt Text: “Illustration of a person standing in a garden, assessing the sunlight, soil quality, and accessibility. They are holding a rake and looking ready to take action.”

Step 2: Plan your Garden
Alt Text: “Illustration of a person standing in front of garden beds, holding a tray of more plants and a garden hoe”

Step 3: Prepare the Soil
Alt Text: “Illustration of a person in a straw hat with a shovel staring at the hole they dug in the ground.”

Step 4: Choose your plants
Alt Text: “Illustration of a person with a wheelbarrow full of plants”

Step 5: Planting
Alt Text: “illustration of a person holding a bag of plant seeds and tossing some of them into the hole on the ground.”

Step 6: Maintenance
Alt Text: “illustration of a person holding a hose and watering plants blooming on the ground.”

Graphic design is inherently visual – what additions or modifications could you make to ensure that learners with visual impairments have access to the same information in an infographic in an online setting?

Ensuring learners with visual impairments have access to the same information in an infographic in an online setting requires careful consideration and the implementation of accessible design practices. Some modifications we can make include providing concise and descriptive alt text for all images and graphics used in the infographic. Screen readers can read this text aloud, allowing learners with visual impairments to understand the content. Also, for physical access, incorporate sensory feedback into the design, such as tactile graphics or braille labels. Tactile graphics can be added alongside digital infographics to provide a tactile representation for learners who are blind or visually impaired. Other aspects include accessible color choices, clear and readable choices, and audio descriptions. By implementing these additions and modifications, you can make infographics accessible to learners with visual impairments, ensuring they have equal access to information online. This aligns with Universal Design for Learning principles and promotes inclusivity in online education.

References

Mayer’s 12 Principles of Multimedia Learning. (2023, June 2). Digital Learning Institute. https://www.digitallearninginstitute.com/blog/mayers-principles-multimedia-learning/

Comments on Learning Pods Posts:

© 2025 Addi Fowler

Theme by Anders NorenUp ↑